Easy small-batch homebrewing, part 2: Basic ingredients and a recipe
Posted on August 11, 2015 at 6:00 am
By Brian Vander Veen
Last week, I talked about the basic equipment one needs to start brewing small-scale, one-gallon batches at home, but obviously, you need more than just equipment—you need ingredients. Beer, at its most basic, comprises only three ingredients: malted grain, hops, and yeast. However, over the millennia since beer was first brewed, those three ingredients have been produced in a bewildering number of varieties, which can be combined in practically unlimited permutations.
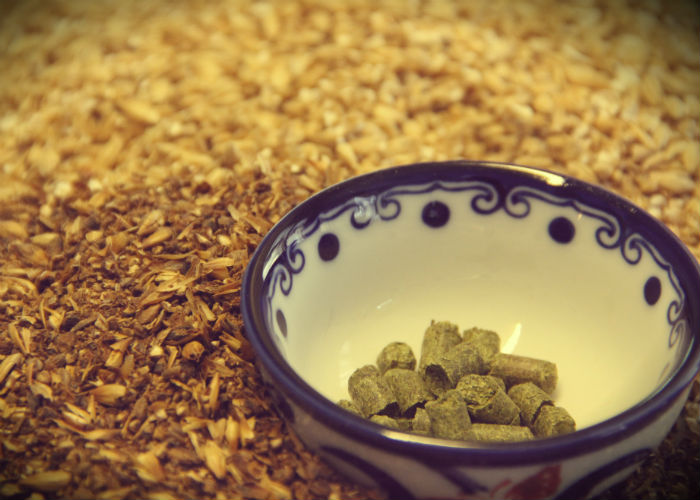
Malt
Malt is simply grain that has been soaked in water just until it begins to germinate and then dried before it can sprout further. The process develops the enzymes that break down the starches into fermentable sugars. Malted barley and wheat are the most common grains used, although others, like malted rye, millet, or buckwheat have become increasingly available to the homebrewer.
Malt can be further processed to produce a wide range of specialty malts that make unique contributions to the color, flavor, or mouthfeel of a beer—from lightly-roasted caramel malt with its subtle toffee-like flavor to deep-brown chocolate malt with the flavor reminiscent of bittersweet chocolate.
More advanced brewers do “all-grain” brewing, but for the beginning homebrewer, malt extracts are also available, both as powdered dry malt extract and syrupy liquid malt extract. Most of my own brewing (and many recipes intended for beginning homebrewers) involves some combination of specialty grains and malt extract.
One other note: unless you have a grain mill at home, you’ll likely want to buy your grains crushed. Remember to choose that as an option if you’re ordering online or talk to your friendly homebrew store employee if you’re shopping in person.
Hops
The flowers of the hop plant have been cultivated for use in beer since the Middle Ages and have long since supplanted other herbs as the standard for flavoring beer. Hops have been selectively bred to produce a surprising range of aroma profiles, from grapefruit-like citrus aromas to herbal scents reminiscent of anise or thyme.
Depending on how they’re used in the brewing process, hops can be used to add bitterness to beer or to contribute flavor and aroma. Boil hops for a longer time and you extract bitterness but lose the subtle aromatic qualities; a shorter time and you won’t extract much bitterness, but you’ll preserve the delicate flavors and aromas. Consequently, brewers will usually add hops at least twice during the brewing process: at the start of the boil for bitterness and again at the very end for flavor and aroma.
Hops for the homebrewer usually come as compressed pellets rather than as whole flowers, although the latter are sometimes also available.
Yeast
There are technically over a thousand species of yeast that have thus far been described by scientists, but the species Saccharomyces cerevisiae is the one best known to bakers and brewers alike for its ability to convert sugars to carbon dioxide and alcohol, making bread rise and beer and wine more pleasurable to drink.
Traditionally, the yeasts used in brewing and baking were the wild strains that naturally occur on cereal grains and the skins of fruits. Wild yeast can be unpredictable, however, so humans have since isolated and cultivated particular strains of yeast for certain purposes and flavor profiles.
A range of yeast strains are available for the homebrewer in order to create different styles of beer, but brewing yeast always comes in one of two categories: dry yeast, which is sold in packets similar to baking yeast; and liquid yeast, which comes in a vial as live culture. Dry yeast doesn’t come in quite the same range of strains, but it’s less perishable than liquid yeast. For one-gallon brewing, I mostly use dry yeast since I can use half a packet for a batch and keep the other half sealed in the fridge for later use.
Other ingredients
The only other ingredient that’s essential for small-batch brewing is a small amount of sugar, called priming sugar, that you need to add before bottling your beer. This small addition provides a second boost of food for the yeast in order to produce the carbonation you’ll want in your finished beer.
You can measure and add the sugar yourself (there are tools available online to calculate the exact amount you need so that you don’t end up with exploding bottles), but for convenience’s sake, I generally use fizz drops available from homebrew supply stores. Fizz drops are basically flavorless hard candies that add a premeasured amount of sugar to each bottle.
There are other ingredients I tend to use in my beers—a little Irish moss to improve clarity and a bit of yeast nutrient for a more reliable fermentation—but those are strictly optional.
Finally, you’re going to need a recipe. My favorite collection of easy, straightforward recipes is George Hummel’s The Complete Homebrew Beer Book. His recipes are intended for five-gallon batches though, so you’ll have to do the math to scale them down for one-gallon brewing.
Here’s one of my own recipes, a simple variation on an American Blonde Ale with the rich golden color of honey malt and the citrus aroma of centennial hops:
Simple Summer Blonde
 4oz Gambrinus honey malt, crushed
4oz Dextrine malt (such as Weyermann Carafoam®), crushed
6g Centennial hop pellets, divided
1lb Extra light dry malt extract
¼ tsp Irish moss (optional)
¼ tsp Yeast nutrient (optional)
½ pack Safale US-05 or other dried American ale yeast
Fermenter’s Favorites™ Fizz Drops or priming sugar
Begin heating five quarts of water in your stock pot to 160F. Meanwhile, measure out your grain, place it in your muslin bag, and tie off the end. When your water is at the appropriate temperature, remove the pot from heat, add your grain bag, cover, and let steep for 30 minutes.
While that’s steeping, measure out and divide your hops equally among two muslin bags (your “bittering hops” and “aroma hops” respectively), and set those aside. When your grains are done steeping, uncover, remove the grain bag, and bring to a boil. Add your bittering hops and let boil uncovered for 45 minutes, being careful not to let the pot boil over. You can use this time to sanitize your carboy and other equipment if you haven’t already done so.
After 45 minutes, remove your stock pot from the heat and stir in your dry malt extract, Irish moss, and yeast nutrient (if using). Return the pot to heat and boil for another 15 minutes. Add your aroma hops, cover, and immediately remove from heat.
Begin to chill your wort by placing the pot in an ice bath. Monitor the temperature with your sanitized thermometer, and when the temperature reaches 65F or so, transfer the chilled wort to your carboy. You can add extra cold water to make up for what evaporated during the boil, but leave plenty of headspace for the fermentation. I usually fill my carboy to where the sides just start to curve toward the neck.
Add the yeast directly to your carboy and set up your blow-off tube, as I described in last week’s blog post. Put the whole apparatus in a cool, dark place. You should see bubbling begin within 72 hours, probably sooner.
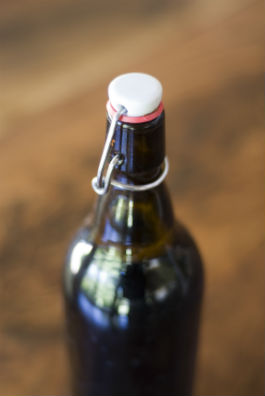
After a week in the carboy, you can bottle your beer. Sanitize your auto siphon and your flip-top bottles (you’ll need about six or seven 16oz bottles), add a fizz drop to each bottle, and use the auto siphon and plastic tubing to fill them up, leaving about an inch of headspace in each. Let your beer condition in the bottles for at least three weeks in a cool, dark place and your beer should be ready!