Halloween craft tutorial: How to make a sock zombie
Posted on October 22, 2015 at 6:00 am
By Kelsey Hudson
 Zombies invaded the library this month at Tween Club. There was zombie poetry, zombie makeup, and we even created our very own sock zombies. But don’t fear! For those of you who missed Tween Club, you can make your very own no-sew sock zombie at home.
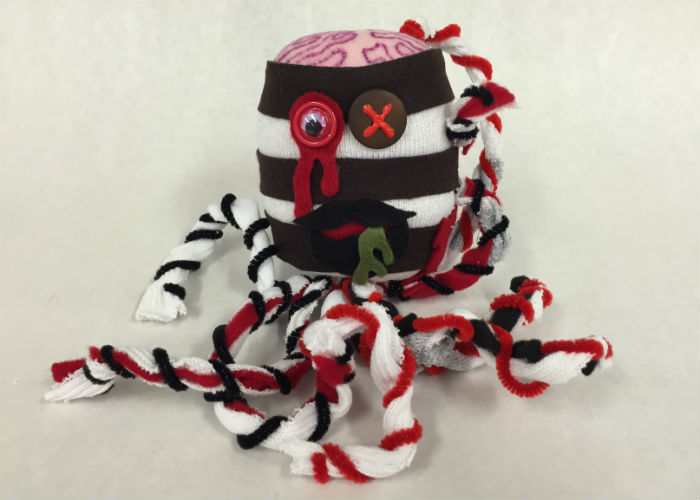
For my own sock zombie, I was inspired by the dapper Sir Squid (as he was named by one of our Tween Club participants), a past sock creature creation that lives on my desk. Not into murderous, zombie squid? You can make your sock zombie into just about any animal or creature you desire, all you need are a few supplies and a little bit of crafting time.
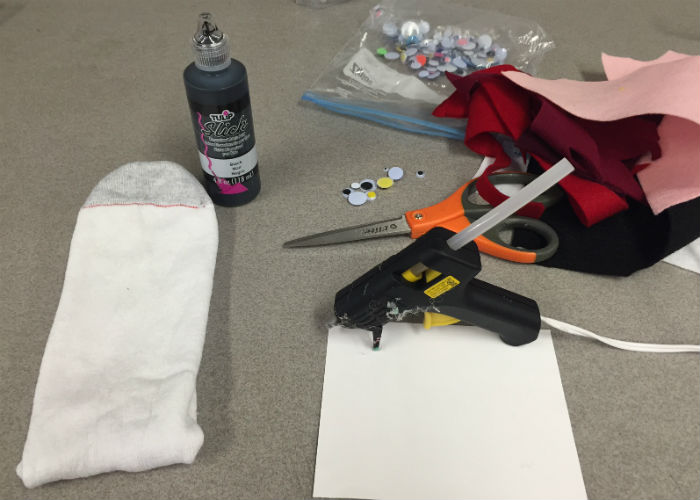
Supplies:
- Tube Socks
- Glue
- Scissors
- Rubber Bands
- Stuffing: Dry Rice, Plastic Bags, and Polyfill work well
- Decorations: Fabric Scraps, Fabric Paint and/or Permanent Markers, Googly Eyes, Buttons, Pipecleaners, etc.
Instructions:
- Gather your supplies and pick out a sock. Now is a great time to use that one sock whose match was sadly eaten by the dryer.
- Stuff the sock with the filling of your choice. Polyfill or recycled plastic bags are great for light, active zombies that sprint after their prey (or those creations that will get played with a lot). Dried rice is better for lazy, rotting zombies that will mostly be sitting around as decorations. I recommend getting help from a friend if you’re using rice, as the process is much easier with one person holding open the sock and another person adding the rice.
- Use rubber bands to secure the sock and keep the stuffing in place. For creatures with multiple body segments, fill the sock in sections. First add some stuffing, then secure a rubber band around the sock. Add more stuffing and repeat this process until you’ve got enough segments.
- If you wish, cut off the excess sock material but just be sure to leave at least one inch or so above the rubber band or you risk it coming undone. If you choose not to trim the excess material, it can make for great tentacles or arms. If you flip your creation upside down, you can make big, floppy ears by cutting right down the middle.
- Dig out all of your old paint, markers, googly eyes, buttons, and fabric scraps to decorate your zombie. Make sure to gather lots of red scraps for all the blood and guts! A low-temperature glue gun works well for this step, but tacky glue will also work, though it will take longer to dry.
- Enjoy your zombie! My own creation, the destructive Count Cannibal of Calamari, is settling in well on my desk. Though Sir Squid and the Flash may never be the same again.
Children in fourth grade and up are welcome to join us each month for Tween Club at North Spokane and Spokane Valley as we make things, play games, and more! Here’s our lineup for next month:
SPOKANE VALLEY – 1st Wednesday of the month at 4 pm
Nov 4 – Stamp It!
Design your own stamp to decorate your stuff. Not ready to commit? We’ll also make a mini book to practice your technique until you’ve got it just right.
NORTH SPOKANE – 3rd Tuesday of the month at 4 pm
Nov 17 – Catapult Challenge
Prepare to get creative and try your launching skills as we design, build, and test our own catapults. We’ll provide a variety of building materials and safe projectiles. Let’s see who can fling things the farthest!