Sweet Treat Recipes You Can Make with Chocolate & Cherries
Posted on December 2, 2021 at 7:45 am
By Stacey Goddard
For over 20 years, one of my holiday traditions has been to make chocolate-covered cherries from scratch. Although seemingly complicated, my first try at making these delectable treats turned out pretty well, so I kept making them.
My only candy-making experience before that first attempt was fudge. And chocolate-covered cherries do take a bit of time to make, but it’s time well-spent given the yummy results.
If you’re hesitant, you can say you’re making these for science!
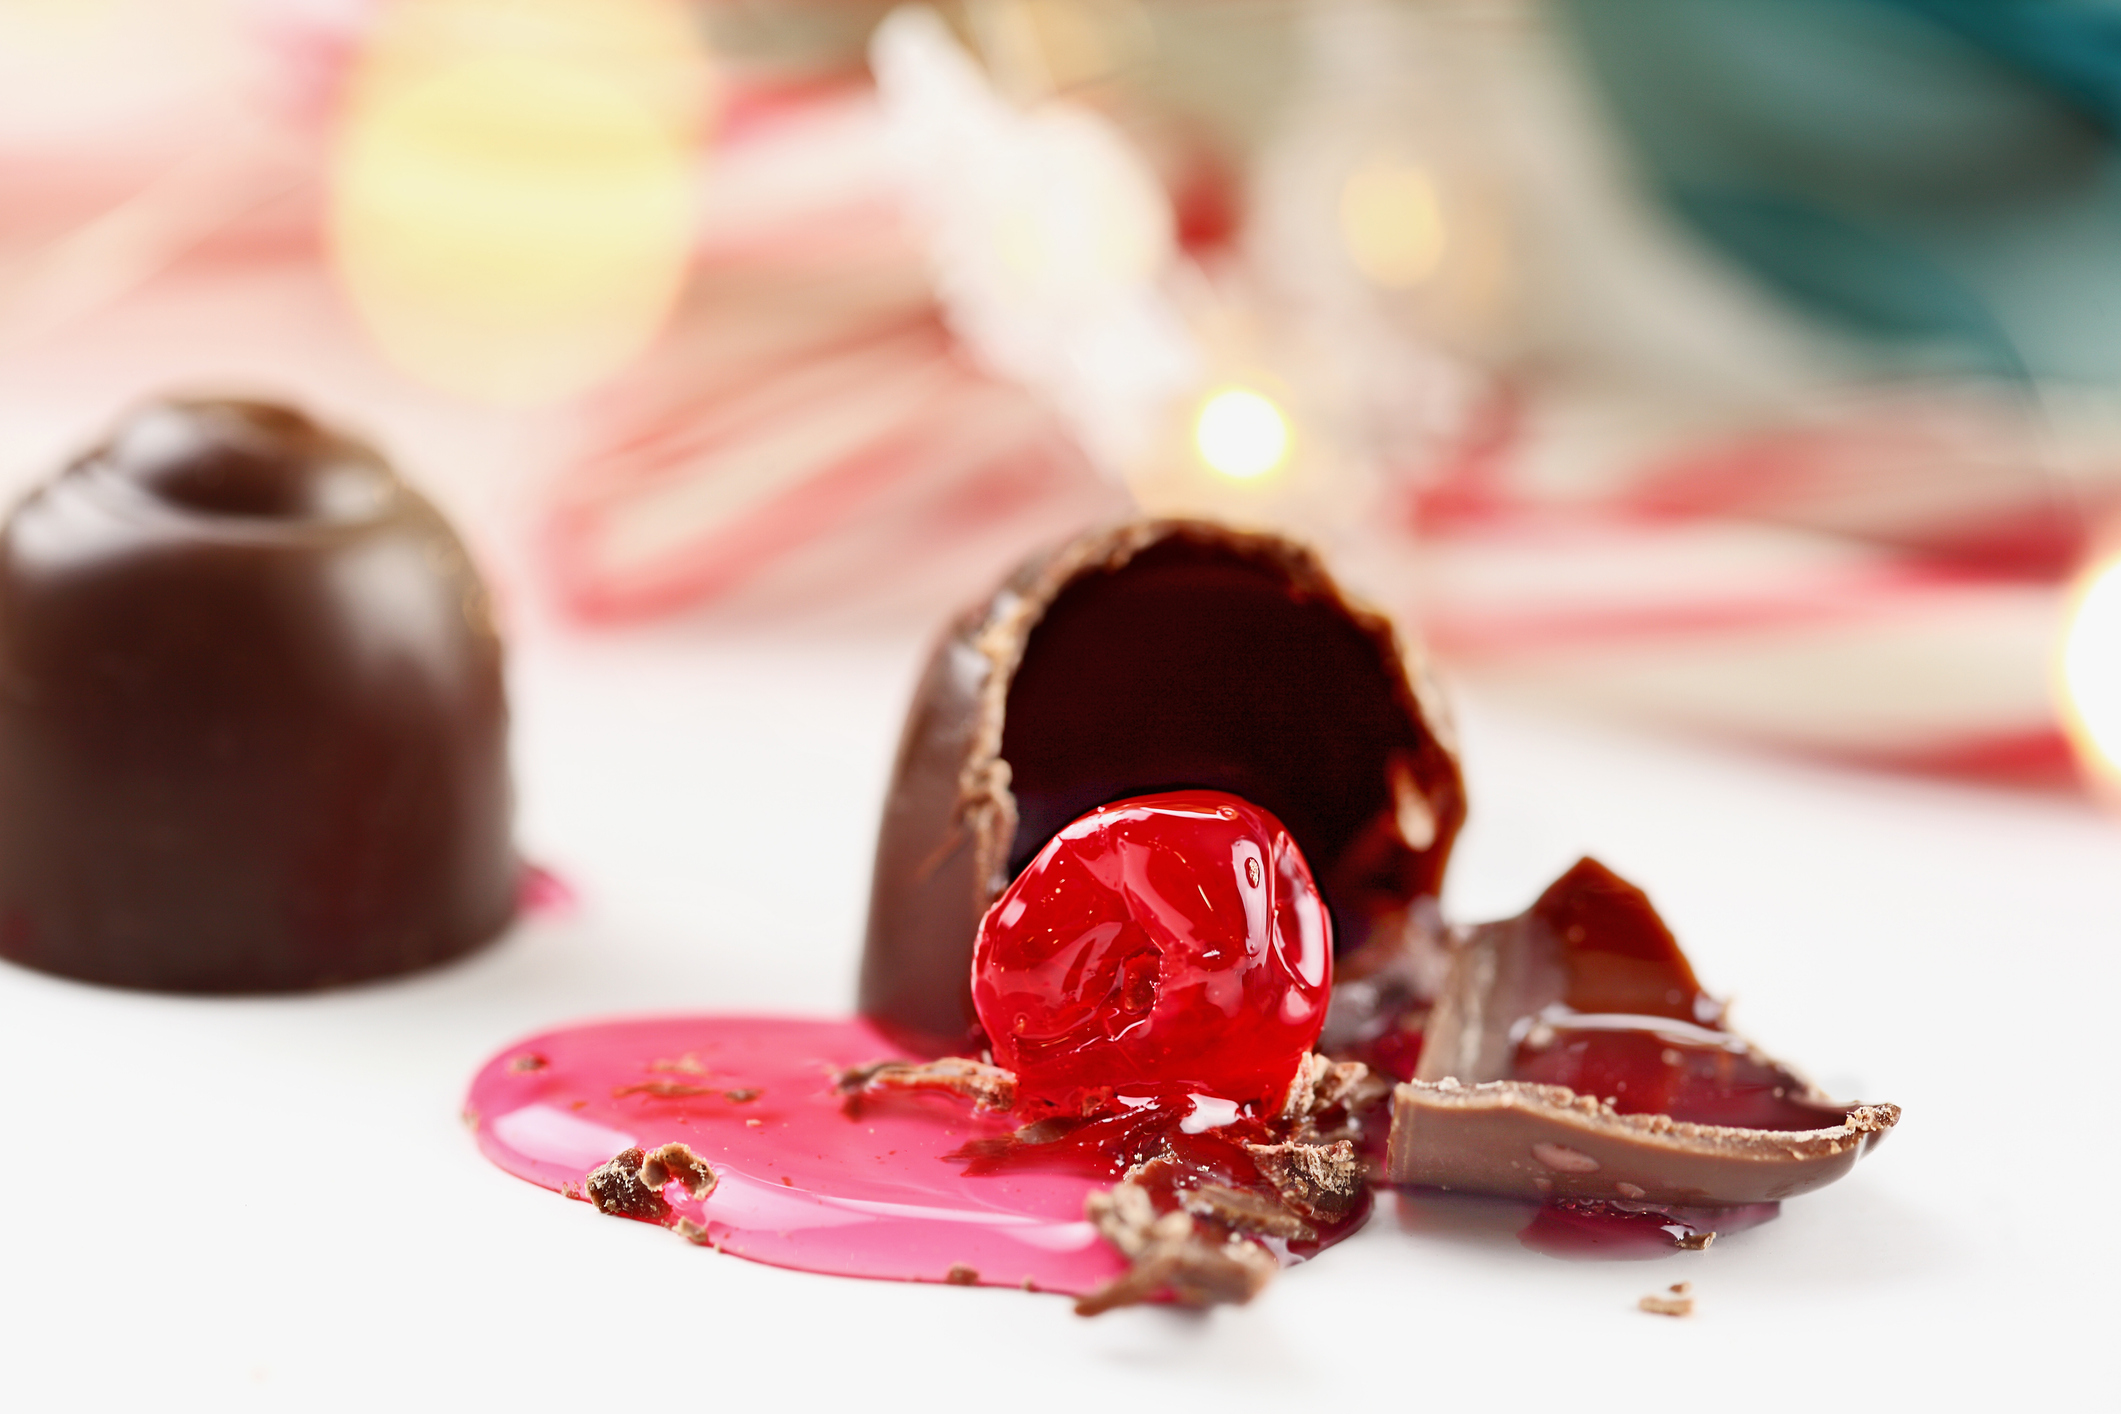
Here’s the science behind chocolate-covered cherries: the center liquifies inside the chocolate coating. This can make for a fun discussion, especially if you have young helpers in the kitchen. Kids may not believe you at first, but you can drop some culinary science and hopefully get help making them.
The chemical reaction between the sucrose (in the corn syrup and powdered sugar) and the moisture in the maraschino cherries causes the white fondant around the cherry to break down (liquify) after a couple of days. And the testing method includes taking a bite into one (and getting to eat it!) to find out.
Before I dive into the recipe, a word about preparing the cherries themselves. The first time I made them, the recipe I used simply said “maraschino cherries, drained” with no elaboration. I quickly learned how important it is to drain the maraschino cherries well—otherwise, you end up with a sticky mess when you wrap the fondant around each cherry.
Advanced Preparation
At least two days before making the candy, I drain the jars of cherries. First, I empty them into a strainer over a bowl or in the sink to drain the liquid and let the cherries sit for 20–30 minutes so they can continue to drain. Then, I put them in a paper towel-lined container with a snap-tight lid so that the paper towel can continue to wick excess moisture.
Don’t worry about over draining the cherries. No matter how long you drain the cherries, there will always be enough moisture remaining for the necessary chemical reaction to occur!
Alternative Preparation: Cherry Cordials
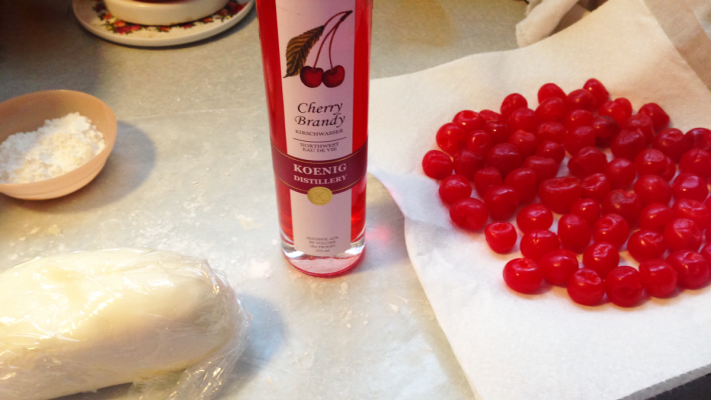
If you’re interested in making cherry cordials (a.k.a. boozy chocolate-covered cherries), you’ll need to start preparing the maraschino cherries at least two weeks ahead of when you want to make the candy. Start by draining the juice from the jars of maraschino cherries. Next, fill the jars (with the cherries still in them) with the liqueur of your choice. I’ve used brandy and amaretto—both are tasty! Recap the jars and set aside for two weeks to allow the cherries to marinate. Be sure to keep the empty liqueur bottle.
It’s time to drain the cherries two days before you plan to make the cordials. Place a strainer in a bowl to capture the liqueur, and empty the cherries and liqueur into the strainer. Pour the liqueur back into its original bottle. It will still be drinkable, but it will be maraschino-colored and a bit sweeter than it was originally. Next, place the cherries in a paper towel-lined container and set aside. They will be ready for covering in two days.
Chocolate-Covered Cherries Recipe
Ingredients
1/3 cup of butter (softened)
1/3 cup light corn syrup
1/4 teaspoon salt
1/2 teaspoon almond extract
4 cups powdered sugar
2 (10 ounce) jars maraschino cherries without stems, drained (see preparation instructions)
Chocolate for dipping
Utensils & Tools
Electric mixer (hand or stand mixer)
Mixing bowls
Sheet pans
Wax Paper
Spatula or other utensils
Flat surface (countertop, tabletop, cutting board, etc.)
Double boiler, cooking pot, or saucepan (optional)
Candy thermometer (optional for tempering chocolate)
Directions
Making the fondant:
Combine the first four ingredients in a large mixing bowl and beat at medium speed, scraping the sides of the bowl often, until everything is well mixed (1–2 minutes).
By hand, gradually stir in 3 cups of the powdered sugar to create the fondant.
Next, turn the fondant mixture onto a surface lightly dusted with powdered sugar. Knead in the remaining 1 cup of powdered sugar into the fondant, and continue kneading until the fondant is smooth (1–2 minutes).
Note: The fondant can be made ahead of time. I usually make it the night before so that I’m not spending an entire day making candy. Just be sure to wrap the fondant tightly in plastic film, and then store it in a zippered storage bag or airtight container.
Wrapping the cherries:
The fondant starts to dry out as it’s exposed to air (this is what it is supposed to do!), so tightly cover the portion you aren’t working with using plastic wrap (fig. 1). You will get the hang of unwrapping part of the fondant, getting a teaspoonful, and rewrapping as you go.
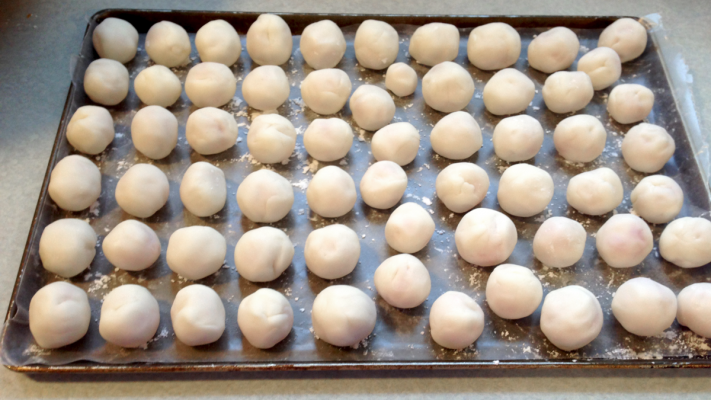
Using about 1 teaspoon of fondant, completely enclose each cherry by flattening out the fondant, putting a cherry in the center, and folding the fondant around the cherry to seal it.
Place the fondant-covered cherries on cookie sheets lined with wax paper. Tip: You can lightly dust the wax paper with powdered sugar to prevent sticking (fig. 2).
Loosely cover the cherries with more wax paper, and refrigerate until firm for about 2–4 hours.
Melting the chocolate & covering the cherries:
If you are using bar chocolate, chop it into small pieces. Chocolate chips are conveniently the perfect size for melting.
Melt the chocolate of your choice in a bowl. There are several ways to apply heat.
Using a microwave, heat for 30 seconds and stir, followed by another 30 seconds and stirring again. If the chocolate isn’t fully melted, heat for 10 seconds more and stir, repeating until melted.
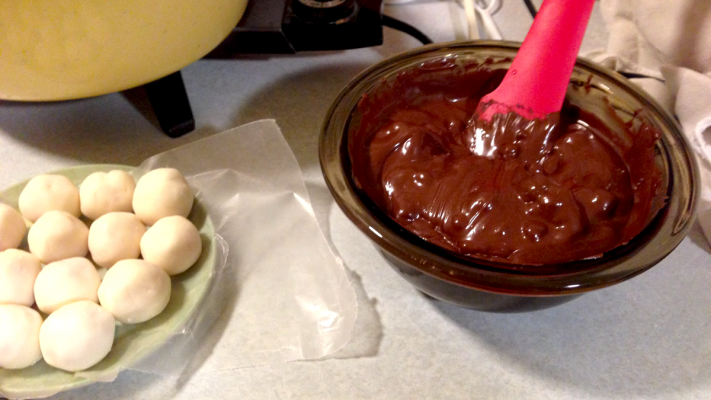
I use semi-sweet chocolate chips (fig. 3), but you can use milk chocolate, candy bark, or whatever you desire. I don’t bother with tempering the chocolate because the candy doesn’t last long enough to bother (they are quickly devoured by family, friends, and colleagues).
If you want to temper your chocolate, you can follow the steps during melting that are recommended by Anita Chu from Epicurious, and you’ll need a candy thermometer.
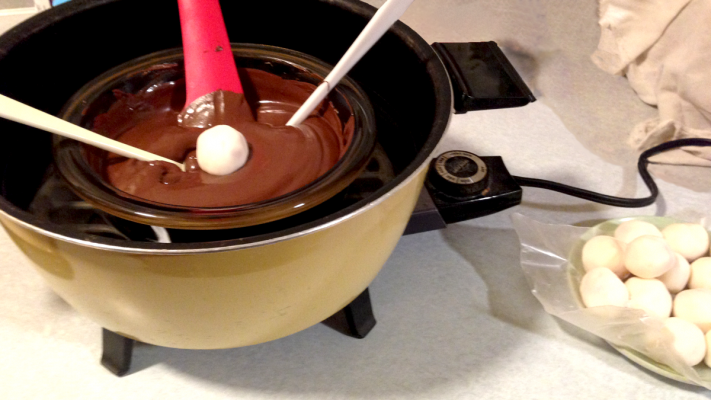
Also, using a double boiler (fig. 4), a slow simmering saucepan of water, or something similar under a glass bowl of melted chocolate will keep your chocolate at a consistent temperature and make it easier to coat the cherries.
Note: If you’ve dusted the wax paper with powdered sugar for your fondant-wrapped cherries, be sure to dust the sugar off prior to the chocolate-dipping process. If you don’t, the powdered sugar can make the melted chocolate difficult to work with.
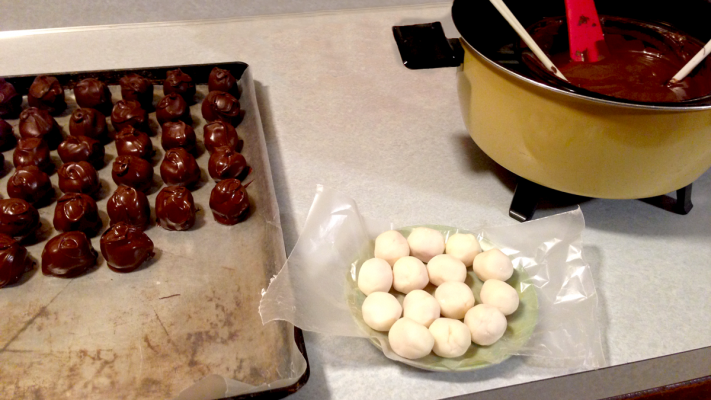
Coat the cherries completely in the melted chocolate, placing them on cookie sheets lined with wax paper to cool (fig. 5).
I leave the chocolate-coated cherries on the cookie sheets for at least an hour at room temperature before storing them. Refrigerating for 10–15 minutes makes it easier to remove them from the waxed paper without breaking the chocolate coating.
Now for the hard part: Do not eat them yet!
Store the candy at room temperature for 3–5 days until the centers soften.
Science takes time, but the wait is worth it, I promise!
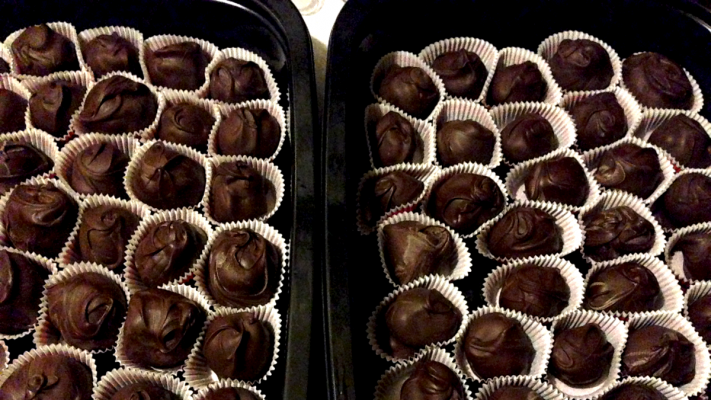
If you’d like a fancy presentation, you can place each chocolate-covered cherry in a paper candy cup (fig. 6). This is a great step when sharing as gifts or at a holiday potluck.
Bonus Recipe: Cherry Kiss Cookies
I have a quicker recipe for those who like maraschino cherries but feel that chocolate-covered cherries are too much work.
I highly recommend this easier and faster recipe for cherry kiss cookies. They have a similar flavor profile, with less work—especially if a friend or family member helps you unwrap the chocolate kisses.
Note: You might want to unwrap a few extra kisses in case they get eaten during the process!
Ingredients
1 cup butter, softened
1 cup powdered sugar
1/2 teaspoon salt
2 teaspoons maraschino cherry juice
1/2 teaspoon almond extract
6 drops red food coloring (optional)
2 1/4 cups all-purpose flour
1/2 cup chopped maraschino cherries
54 milk chocolate kisses, unwrapped
Directions
Preheat your oven to 350 degrees.
In a large bowl, beat butter, powdered sugar, and salt until blended. Beat in cherry juice and extract, and if desired, food coloring.
Gradually beat in flour.
Stir in cherries.
Shape dough into 1-inch balls. Place them 1 inch apart on greased baking sheets. Alternatively, you can use a Silpat mat or parchment paper on your baking sheet instead of greasing.
Bake 8–10 minutes or until bottoms are light brown.
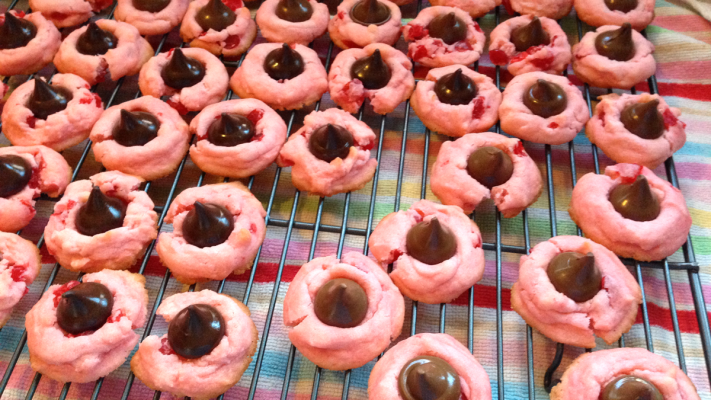
Immediately press a chocolate kiss into center of each cookie. The cookies will crack around edges and that’s okay!
Cool on baking sheets for 2 minutes, and then remove to wire racks to cool (fig. 7).
This recipe makes four-and-a-half dozen cookies.
Both the chocolate-covered cherries and the cookies make great gifts (if you and your family manage not to eat them all first!).
I wish you happy baking and candy making this holiday season!

Tags: adults, baking, candy making, cherries, chocolate, cooking, crafting, holiday, recipe, recipes, teens